
3 Series E92 328xi (N51) COUPE
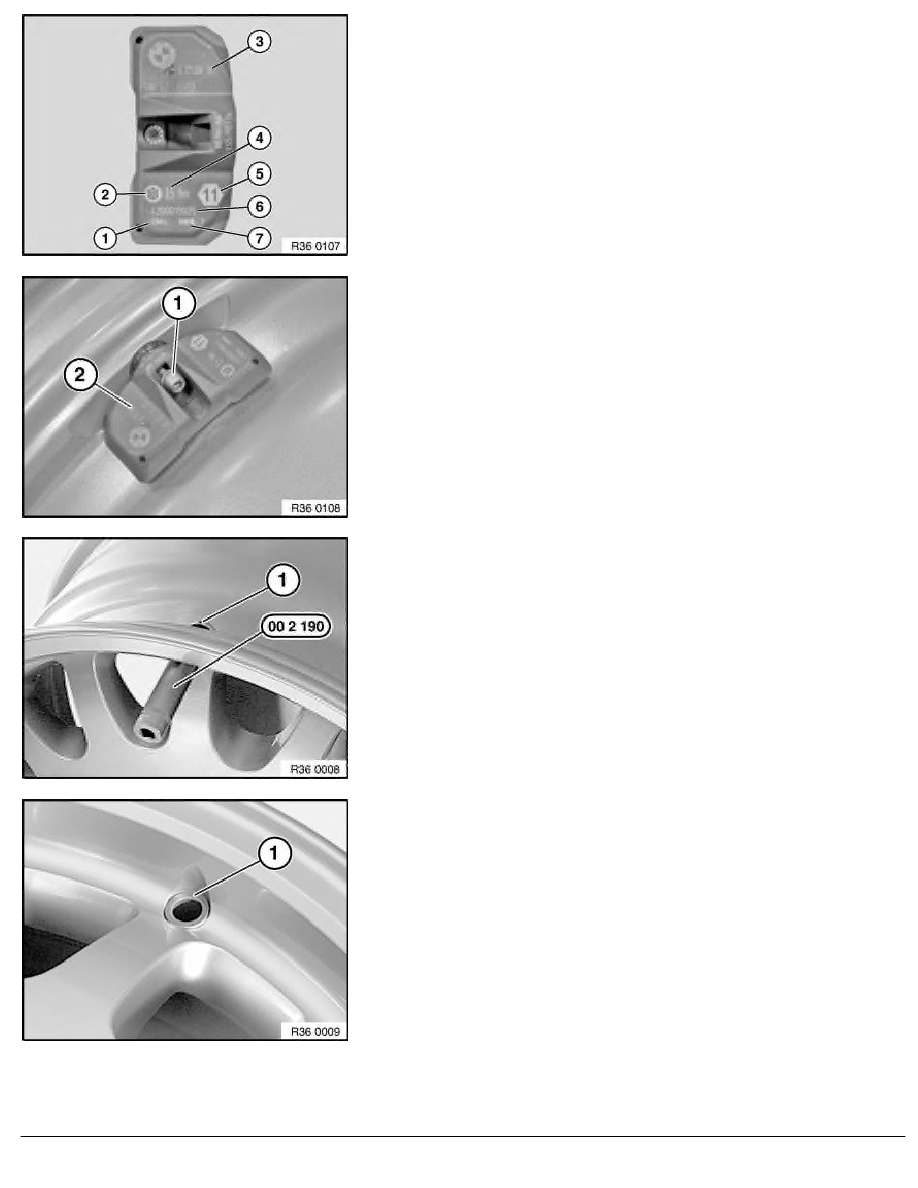
Labelling of wheel electronics
1
Transmitting frequency of wheel electronics
2
Large Torx socket
3
BMW part number
4
Tightening torque of Torx screw and union nut
5
Width across flats of union nut
6
Serial number of wheel electronics
7
Date of manufacture of wheel electronics
Removing wheel electronics
Release Torx socket crew (1) and remove wheel electronics (2).
Release union nut with special tool 00 2 190 ; if necessary, grip
valve insert (1) at cylindrical section of ball head.
Remove valve insert from rim.
Remove washer (1).
RA Removing and installing / replacing RDC wheel electronics
BMW AG - TIS
04.02.2013 06:06
Issue status (12/2007) Valid only until next DVD is issued
Copyright
Page - 2 -